
Arduino Base
My second arduino board kit
Bought this https://www.aliexpress.com/item/4001107780551.html
And experimented a bit: https://pastebin.com/G3L1uD2Y
DISPLAYING SENSOR DATA CUSTOMIZED!

https://www.circuitbasics.com/arduino-7-segment-display-tutorial/ https://www.makerguides.com/lm35-arduino-tutorial/
#define sensorPin A0
#include <SevSeg.h>
    int digitBuffer[4] = { 0};
SevSeg sevseg; //Instantiate a seven segment controller object

unsigned long previousMillis = 0;
const long interval = 1000;
int i, j, k;

void setup()
{
    byte numDigits = 4;
    byte digitPins[] = {10, 11, 12, 13};
    byte segmentPins[] = {9, 2, 3, 5, 6, 8, 7, 4};

    sevseg.begin(COMMON_ANODE, numDigits, digitPins, segmentPins);
    sevseg.setBrightness(10);
    //Serial.begin(9600);

}

void loop()
{


    int reading = analogRead(sensorPin);
    float tempC = reading * (5000 / 1024.0) / 10;


    /*unsigned long timerGlobal = millis();
    sevseg.setNumber(timerGlobal/1000);
    sevseg.refreshDisplay();*/

    static unsigned long timer = millis();
    if (millis() >= timer) {
    timer += 300;
    sevseg.setNumber(tempC, 2);
    }

    sevseg.refreshDisplay();
    /*Serial.print(tempC);
    Serial.print(" \xC2\xB0"); // shows degree symbol
    Serial.println("C");
    delay(1000);*/


}
WATER SENSOR
https://arduinogetstarted.com/tutorials/arduino-water-sensor
STEPPER MOTOR BIG
https://youtu.be/avrdDZD7qEQ https://www.lombardoandrea.com/motori-passo-passo-arduino-joystick/
SG90 MICRO SERVER
https://www.youtube.com/watch?v=ceTYMgdfhRk
STEPPER MOTOR WITH JOYSTICK

https://simple-circuit.com/arduino-stepper-motor-joystick-control/ https://create.arduino.cc/projecthub/arduino-applications/stepper-motor-control-with-joystick-f5feb1
   Unipolar stepper motor speed and direction control with Arduino
   *   and joystick
   * This is a free software with NO WARRANTY.
   * https://simple-circuit.com/
   */

  // include Arduino stepper motor library
  #include <Stepper.h

  // define number of steps per revolution
  #define STEPS 32

  // define stepper motor control pins
  #define IN1  2
  #define IN2  3
  #define IN3  4
  #define IN4  5

  // initialize stepper library
  Stepper stepper(STEPS, IN4, IN2, IN3, IN1);

  // joystick pot output is connected to Arduino A0
  #define joystick  A4

  void setup()
  {

  }

  void loop()
  {
    // read analog value from the potentiometer
    int val = analogRead(joystick);

    // if the joystic is in the middle === stop the motor
    if(  (val  500) && (val < 523) )
    {
      digitalWrite(IN1, LOW);
      digitalWrite(IN2, LOW);
      digitalWrite(IN3, LOW);
      digitalWrite(IN4, LOW);
    }

    else
    {
      // move the motor in the first direction
      while (val = 523)
      {
        // map the speed between 5 and 500 rpm
        int speed_ = map(val, 523, 1023, 5, 500);
        // set motor speed
        stepper.setSpeed(speed_);

        // move the motor (1 step)
        stepper.step(1);

        val = analogRead(joystick);
      }

      // move the motor in the other direction
      while (val <= 500)
      {
        // map the speed between 5 and 500 rpm
        int speed_ = map(val, 500, 0, 5, 500);
        // set motor speed
        stepper.setSpeed(speed_);

        // move the motor (1 step)
        stepper.step(-1);

        val = analogRead(joystick);
      }

    }

  }
FLAME SENSOR
https://geekydaayaree.blogspot.com/2020/04/2-pin-flame-sensor-interfacing-with.html
    int flameSensorPin = 0; //  a0
    int flameSensorReading;
    int buzzerPin=8;
    void setup(void)
    {
    Serial.begin(9600);
    pinMode(buzzerPin,OUTPUT);
    }
    void loop(void)
    {
    flameSensorReading = analogRead(flameSensorPin);
    if(flameSensorReading<1023)
    {
    digitalWrite(buzzerPin,HIGH);
    }
    else
    {
    digitalWrite(buzzerPin,LOW);
    }
    Serial.print("Analog reading = ");
    Serial.println(flameSensorReading); // the raw analog reading delay(1000);
    delay(500);
    }
RFID SERIAL MON
https://create.arduino.cc/projecthub/MisterBotBreak/how-to-use-rfid-with-serial-monitor-ecfc26

DHT11 SENSOR
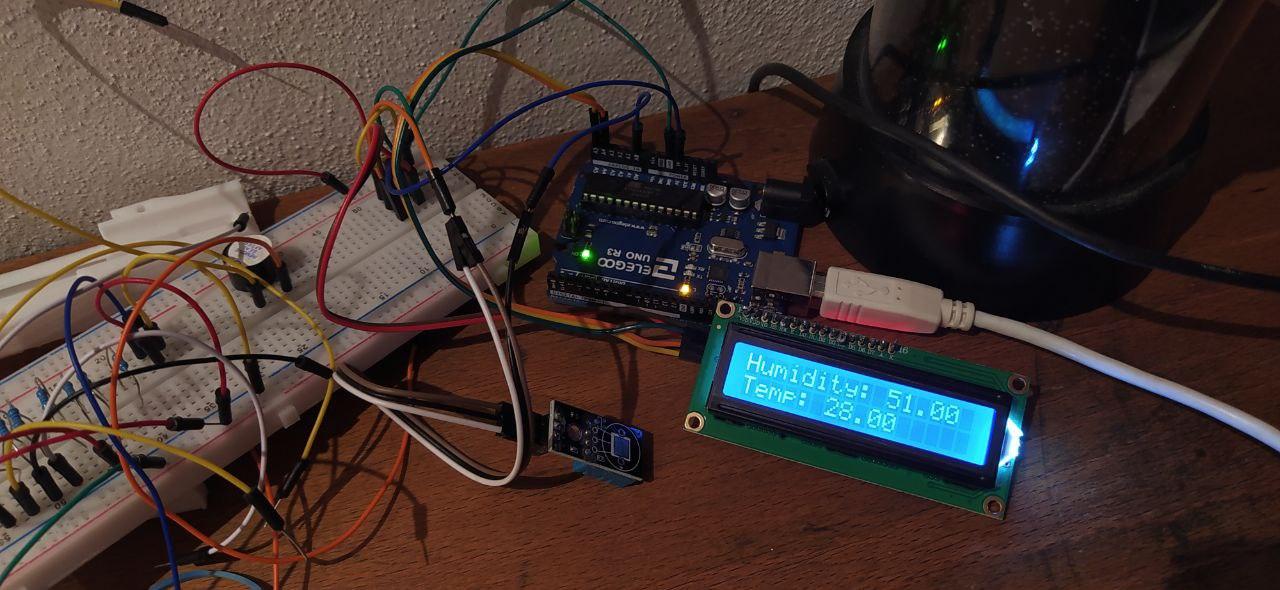
https://forum.arduino.cc/t/solved-lcd-i2c-problem-printing-text/510124/4
  #include <Wire.h>
  #include <hd44780.h>                       // main hd44780 header
  #include <hd44780ioClass/hd44780_I2Cexp.h> // i2c expander i/o class header
  #include "dht.h"
  #define dht_apin A0 // Analog Pin sensor is connected to

  dht DHT;
  hd44780_I2Cexp lcd; // declare lcd object: auto locate & config exapander chip

  // LCD geometry
  const int LCD_COLS = 16;
  const int LCD_ROWS = 2;

  void setup()
  {
  int status;

   status = lcd.begin(LCD_COLS, LCD_ROWS);
   if(status) // non zero status means it was unsuccesful
   {
   status = -status; // convert negative status value to positive number

   hd44780::fatalError(status); // does not return
   }


  }

  void loop() {
     DHT.read11(dht_apin);
     lcd.setCursor(0,0);
     lcd.print((String)"Humidity: " + DHT.humidity);
     delay(2000);
     lcd.setCursor(0,1);
     lcd.print((String)"Temp: " + DHT.temperature);
     delay(2000);
     lcd.clear();
     delay(2000);

    }